
Scroll To See More Images
I thought I was doing something impressive every time I plucked the hairline of my basic beauty supply wigs. That something is nothing compared to someone who actually knows how to customize a wig with expert precision. Such was the case when I visited Doll Maker Studio in New York (pre-pandemic) to watch wig and weave stylist Anthony Jackson (aka @JaxxStylez) transform two units I had very specific visions for. One would be a wavy, ever so slightly curly bob and the other would give me Old Hollywood glamour with body and bounce. In other words, I wanted one wig for everyday wear and another to whip out for special occasions. If you’re like me and rather leave the heavy lifting to a pro or want to brave the wig customization process at home, here’s what the most important steps look like on just one of my wigs.
Pick Your Wig
For starters, don’t breeze through the research required for a wig you love. I envy anyone who is able to narrow down their choices and add to cart in a matter of minutes. Personally, I need to clear out a significant part of my day for this step. I’ve gotten lost in dozens of YouTube reviews and even more wig websites searching for a look that would hopefully make me do a double-take; the good kind of double-take, BTW. More often than not, I begin my search with at least a style in mind—say, a bob with bangs, a platinum blonde lob, or something ultra-long like Beyoncé in her LEMONADE era—but even that barely moves the needle. I’m still left with an innumerable amount of quality options to choose between.

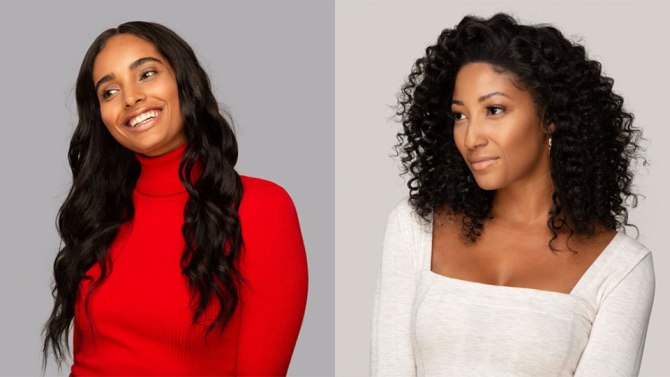
Mayvenn.
So far, the only factor to shorten my quest is sticking with wig brands that have especially good word of mouth. In my circle of friends, that honor goes to Mayvenn. The Black-owned brand has been around for years, though until a few months ago, I had never taken the plunge and invested in any of their products because I procrastinate like it’s an Olympic sport. That changed in late February when I got the Brazilian Loose Wave 360 Wig for my special occasion look and the Brazilian Deep Wave 360 Wig for my wavy bob look. The affordable pricing combined with the add-on of free customization by a local stylist had me sold. Soon after, the fun part began.

Courtesy of Author/Giphy.
Part, Pluck and Repeat
After shaking out my loose wave wig, Anthony placed it on a sturdy wig stand and got to plucking. Though most people start the customization process by bleaching the knots (more on this in a sec), Anthony prefers working on the hairline first so he “can see the dark spots and fullness of the hair.” Nowadays, it’s possible to order a wig that’s already been pre-plucked to make the hairline look realistic which in turn, leaves you with less work to do.
However, the beauty of a pro custom job is that you can sit with a stylist and describe exactly how you want it to look. In my case, Anthony plucked the hairline in such a way that it mimicked my natural one. He also took his time moving from the front to the middle-ish part of the unit, leaving about an inch in between each part. In other words, he would pluck, make a thin part, pluck, and so on and so forth. If you’re doing this at home, you’ll need a rat tail comb and fine-point tweezers. Generally speaking, straight-hair wigs require more plucking than curlier units too.

Courtesy of Author/Giphy.
Bleach the Knots
Next came the part I was definitely happy to pass off. Once you’ve finished your first round of plucking to adjust the density of your wig hair and improve the hairline, bleaching the knots at the base of the lace cap helps to create the illusion of a natural scalp when you part your wig hair. Otherwise, you’re left with an awkward-looking surface that, for lack of better words, doesn’t look cute.

Courtesy of Author/Giphy.
With protective gloves on his hands, Anthony used Clairol Kaleidocolors and developer to lift the color. Specifically, he mixed one scoop of Kaleidocolors with two parts developer to achieve a thick and creamy consistency. Though it’s not pictured here, he also sprayed the wig beforehand with Sparks Color Care Protecting Spray to protect the roots of the wig from getting bleached too.
To apply the developer, he flipped the wig inside out to expose the inner lace. From there, he used the applicator brush to lay the solution onto the front of the lace, starting at the hairline. “We’re not applying too much pressure because I don’t want it to seep through,” he added. He also recommends applying down to the middle of the lace. This ensures that you have more versatility with styling so no matter how you part the wig, the exposed part has already been customized. Once you’re done applying the color lifter, let it sit for 10 minutes to fully process. However, continue checking the hairline to make sure that color isn’t lifting too much. If you don’t notice a mistake until after you’re done customizing, simply use tint spray or pluck the affected area to correct.
Wash and Condition
After letting the solution sit for 10 minutes, it was time to rinse off. But instead of simply dousing the unit with water, he applied purple shampoo on top, lathered, and rinsed. This helps “take the brassiness out and make it more flesh-like.” From there, Anthony saturated the area with the color lifter and rinsed. After that, he went straight into a wash day routine for the wig.

Courtesy of Author/Giphy.
The shampoo and conditioning routine allows you to “remove some of the hair plucked before” and ensures that you get all of the loose fibers out. Whereas purple shampoo is best for rinsing out bleaching solution, the type of shampoo and conditioner you use afterward depends on the type of hair you’re customizing. The simplest way to approach cleansing a wig is to treat it the way you would your real hair, while also noting the specific condition of your unit.

Courtesy of Author/Giphy.
For instance, human hair and synthetic hair shouldn’t be treated the same. Anthony says you should “never wash synthetic hair” or bleach the knots. Simply tweeze and use tint spray. Do your research before attempting any of this at home. Also, be sure to detangle as you’re conditioning to make styling easier afterward and to remove any leftover bleach residue.

Courtesy of Author/Giphy.
Part, Pluck, and Repeat (Again)
Once you’ve rinsed the wig thoroughly, it’s time to pluck again. In my case, Anthony put the wig back on a mannequin head and repeated the same plucking steps from the beginning. Going back in a second time means you can create an even more precise and realistic-looking hairline and/or part since the knots at the base of your wig have been lightened.
Plus, wet hair is easier to manipulate and a quality wig like those from Mayvenn gives you a great starting point anyway. The timing of this step ultimately depends on your end goal, so don’t tie yourself to a specific deadline. For Anthony, this depends heavily on his client’s needs. I wanted my wig to be versatile and something I could part in a couple different ways, so he spent extra time plucking away at different angles.

Courtesy of Author/Giphy.
Step Away While It Dries
Now you get a break! After finishing up the hairline and parts, let the hair dry. Because I was in a salon, she got to sit under a hooded dryer, which I found hilarious and kind-of adorable. If you’re at home, be sure to lay it flat on a towel and hit pause until it’s completely dry.

Courtesy of Author/Giphy.
Apply Lace Tint Spray
Once the wig was dry, Anthony hit the cap with one even layer of EBIN New York Tinted Lace Spray, holding the can about six inches away from the hair. Tint spray is what gives the cap a scalp-like finish that leaves onlookers wondering if your wig is real or faux. If you’re dealing with human hair, Anthony recommends lightly tinting your wig every time you shampoo to keep it looking fresh.

Courtesy of Author/Giphy.
Put It On (Finally!)
Once the tint spray had a couple of minutes to dry, it was finally time to put the wig on. After securing my natural hair under a wig cap, Anthony placed it on my head. (He also attached a band inside the back of the wig for a more snug fit; just one of the many benefits that come with professional customization.)

Courtesy of Author/Giphy.
After applying wig tape underneath the hairline (and away from my edges—phew!), he used a comb and blowdryer to melt down the tape adhesive and set the wig in place. Wig tape is best for short-term wear (about 5 days) while careful glue application is best if you want to keep the wig on your head longer (2-3 weeks).

Courtesy of Author/Giphy.
Perform Some Hairline Magic
Next, he used scissors to remove the lace from the front of my wig—a step that required sitting very still. “You don’t want to create a straight hairline when you’re cutting lace,” he added. “You want to do it in a curved movement so it looks like your hairline.”

Courtesy of Author/Giphy.
From there, he used makeup to help disguise the lace along my hairline and part. Powder or cream is okay to use, though Anthony prefers the latter because he can “control it better.” Use a small brush to hit the hairline and your part, which will also tone down the shininess of wig tape.

Courtesy of Author/Giphy.
Style It Up
To wrap things up (though I honestly could’ve watched him play with wigs all day), he used a couple of hot tools and styling products to achieve the throwback glamour I wanted. The hot comb helped to smooth down my roots and a curling wand gave me big, luscious waves.

Courtesy of Author.
And just like that—mission fully accomplished. As you can see, leveling up your custom wig game isn’t for the faint of heart. It takes time, patience, and a penchant for the tiniest of details. I don’t know if I’ll ever have what it takes to do this on my own. If I can leave this part to a salon professional, 9 times out of 10 I will. But if you’re a DIY-er, now you know what you’re in for if you want it to look good good.
Our mission at STYLECASTER is to bring style to the people, and we only feature products we think you’ll love as much as we do. Please note that if you purchase something by clicking on a link within this story, we may receive a small commission of the sale and the retailer may receive certain auditable data for accounting purposes.
