
My love of acrylic nails dates back to my pre-teen years, so it should come as no surprise that I know how to apply press-on nails when needed. Every two weeks, my mom and I would go to the nail salon to get our nails done as a Saturday morning ritual. After years of begging, my mom finally let me get short acrylic nails in an attempt to keep me from biting my natural ones. From that first appointment I was hooked—I pretty much always wore acrylics when I had the funds to do so.
As much as I loved an acrylic manicure with all the bells and whistles, my freelance writer income could no longer afford paying up to $100 for one monthly (sometimes bi-weekly) nail set. In addition to burning a hole in my wallet, these routine trips to the nail salon were compromising the health of my natural nails. Even with me switching to gel manicures, then later doing them at home, my nails were becoming more fragile by the minute. In hopes of saving my nails from the destruction, I stopped painting them and wearing false nails altogether until I could find something that would keep my nails looking fabulous without compromising their health.
After months of looking at my bare nails, I decided to attempt replacing the luxurious manicures I became accustomed to with at-home press-on nails. I know what you’re thinking—press-on nails are so ’90s and so not worth the headache of them falling off at any given moment. While these concerns are valid, I want to be the first to tell you that press-on nails have come a long way. Today, they look much more realistic and last longer than ever before. They’re also available in most of the trendy styles that we see all over our Instagram feeds. Plus, they’re affordable and easy to apply at home.
I most recently tried the KISS Gel Fantasy High Volume Gel Sculpted Nails and it’s already the press-on nail style I need to have at all times. Seriously—If you’re new to the world of press-ons, this is the set that will encourage you to press on and on and on. To help you comfortably apply and rock press on nails, I’ve outline five crucial but beginner-friendly steps below.
Mika Robinson.
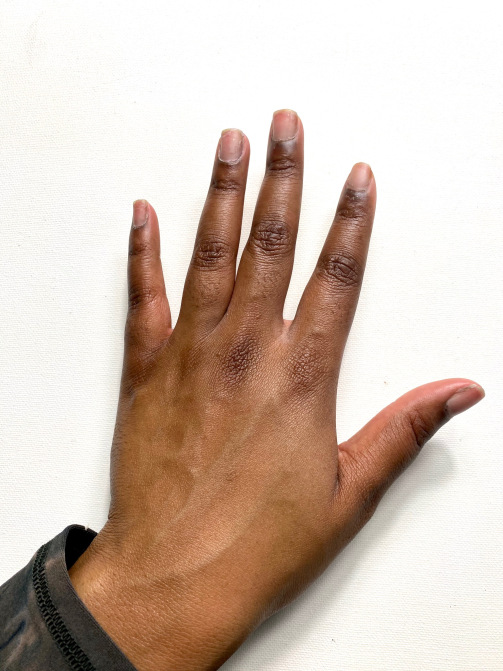
Always start with clean nails.
As with any surface that you put an adhesive on, your nails need to be polish-, oil-, and dirt-free to ensure your press on set lasts. After removing any traces of nail polish with polish remover or acetone, be sure to wash your hands with soap and warm water thoroughly. Also, use an alcohol pad to remove any excess oil present on your nail beds.
Pro Tip: Gently buff the surface of your nail for an extra-smooth surface your press-on can actually stick to.

Mika Robinson.

Mika Robinson.
Size the press-ons to match your natural nail shape.
Most press-on nail kits come with anywhere from 20 -32 nails in varying sizes. You want to find a nail for each of your fingers by sizing it before applying any glue. It should either be the exact size of your nail (entirely covering both edges) or slightly larger so you can use a nail file to downsize the side edges.
Avoid applying a false nail that is smaller than your nail bed, as it may easily lift on the sides when wearing.

Mika Robinson.
Apply glue to your natural nails (one nail at a time).
A thin layer of glue is all you need to ensure your nails stick correctly. Avoiding putting too much glue as this will cause the glue to spill over onto your skin and cuticles.

Mika Robinson.
Apply pressure to the nail to help that nail adhere as firmly as possible.
This is where the word “press” in “press on” comes into play. After applying the perfect amount of glue to your nail, place the false nail on your natural nail (as close as possible to the cuticle) and gently apply pressure to the nail. FYI, you can place the nail immediately after the applying glue—there’s no need to wait for it to dry down or get tacky before application.
Repeat this process for all ten nails, and remember to take your time! If you’re using adhesive tabs instead of glue, the same principle applies here. Apply pressure on the nail to make sure it’s secure.

Sally Hansen.
Apply a top coat for a gel-like shine (optional).
In my opinion, one key difference between acrylics and store-bought press on nails is the impeccable shine of acrylic tips (especially if they’re painted with gel polish). To achieve this look, apply a top coat on your press-on nails.

Mika Robinson.

Mika Robinson.
It’s that simple! Take your time while applying, and you’ll be on your way to being a self-proclaimed press-on nail queen. Ahead, three more standout design options to try at home.

Kiss.
Kiss Jelly Fantasy On-Trend Translucent Nails

Kiss.
Kiss Glam Fantasy Ultimate Diamond Nails

Kiss.
Kiss imPress ‘Ten Different Looks’ Press-On Manicure

Kiss.
Kiss Room Service imPRESS Press-On Manicure
Our mission at STYLECASTER is to bring style to the people, and we only feature products we think you’ll love as much as we do. Please note that if you purchase something by clicking on a link within this story, we may receive a small commission of the sale and the retailer may receive certain auditable data for accounting purposes.
